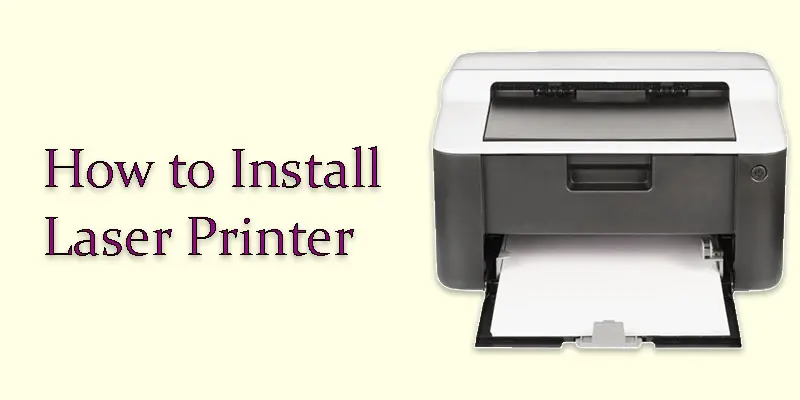
How to Install the Laser Printer | Simple Tips for Beginners
Published: 2 Oct 2025
Installing a laser printer may sound tricky, but did you know that most modern printers can be set up in less than 15 minutes? With the right steps, anyone can connect and start printing without expert help. Learning how to install a laser printer is easier than many people think.
Have you ever wondered why your new printer refuses to work even after you plug it in? Many beginners face this confusion and waste hours figuring it out. That’s why knowing how to install a laser printer the correct way saves time and stress.
Paper jams, driver issues, or poor connections are common problems users face. If you’ve struggled with these before, you’re not alone. In this guide, we’ll show you how to install a laser printer step by step so you can print smoothly from day one.
What Should You Know Before Using a Laser Printer?
It’s crucial to understand the components, setup requirements, and operation of a laser printer before you begin using it to ensure seamless printing.
- A laser printer uses toner powder, not liquid ink.
- It prints fast and gives sharp text and clear images.
- Some models work with a USB cable, while others connect to Wi-Fi.
- You need to install the right driver or software before printing.
- Regular cleaning and proper paper loading help avoid jams.
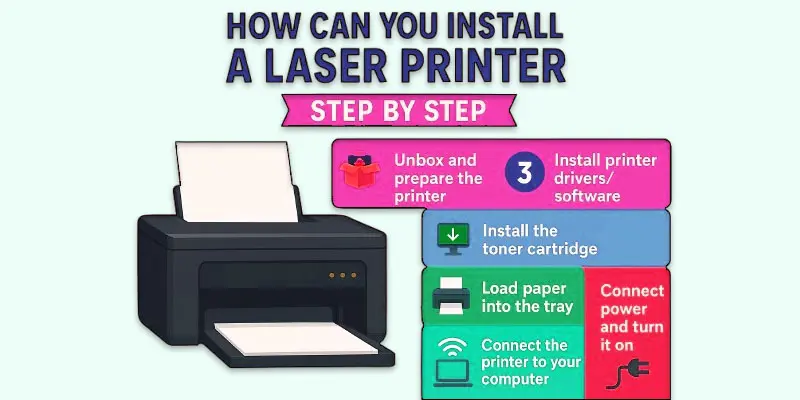
How Can You Install a Laser Printer Step by Step?
Installing a laser printer becomes easy when you follow each step in order, from unboxing to printing your first page.
- Unbox and prepare the printer
- Run a test print
- Install printer drivers/software
- Install the toner cartridge
- Load paper into the tray
- Connect power and turn it on
- Connect the printer to your computer or Wi-Fi
Unbox and prepare the printer
When you get your new laser printer, start by opening the box carefully. Take out the printer and remove all the plastic wraps, tapes, or covers. Wherever you intend to use it, place the printer on a flat table or desk. Make sure the location is close to a power outlet and, if necessary, your computer or wireless network router. Check the box for extra items like cables, toner, and manuals. Keep everything handy so you don’t miss any part during setup.
Connect power and turn it on
Take the power cable that came with your laser printer. Plug one end into the printer and the other end into a nearby power outlet. Make sure the cable is fitted tightly at both ends. Find the power button on your printer and press it. Wait a few seconds while the printer starts up. Most printers will show a light or display screen to tell you they are ready.
Install the toner cartridge
Open the front cover or panel of your laser printer. Take the toner cartridge out of its box and remove any protective seals or tapes. Hold the cartridge carefully and avoid touching the green drum surface. The cartridge should click into position after being slid into the printer’s slot. Properly close the printer cover. Your printer is now prepared to print using the toner.
Load paper into the tray
From the bottom of your laser printer, remove the paper tray. Fill the tray with a stack of fresh paper, being careful to arrange the sheets evenly. To ensure that the sheets fit tightly without bending, adjust the paper guides. Avoid packing the tray too full, as this could result in jams. Firmly insert the tray back into the printer. Your printer is now ready with paper for printing.
Connect the printer to your computer or Wi-Fi
If your printer is wired, connect it to your computer using the USB cord. Verify that both ends of the cable are securely plugged in. Choose the Wi-Fi configuration option from the printer’s control panel if it’s wireless. Enter the password after selecting your Wi-Fi network. A confirmation message will appear once the printer has connected. Now your printer is linked to your computer or network.
Install printer drivers/software
Most printers come with a CD or a link to download drivers online. Insert the CD into your computer or visit the printer company’s website to get the software. It can be installed step-by-step by following the on-screen directions. If your computer supports auto-install, the drivers may set up automatically when you connect the printer. Make sure the installation finishes without errors. Once done, your printer will be ready to use.
Run a test print
After installing your printer, go to your computer’s settings and open the “Printers” or “Devices” option. Select your laser printer from the list. Click on the option that says “Print Test Page.” The printer will take a few seconds to start printing. Check the test page to see if the text and images look clear. If the page is fine, your printer is ready for regular use.
What are the Common Problems with Laser Printers and How Can You Fix Them?
Like any machine, laser printers can face small problems, but the good news is that most of them are easy to fix at home.
- Printer not detected: Check the USB cable or reconnect to Wi-Fi.
- Paper jams: Remove stuck paper carefully and reload the tray.
- Faded or light prints: Replace or shake the toner cartridge.
- Slow printing speed: Reduce print quality settings or free up memory.
- Error messages: Restart the printer or reinstall drivers.
What Extra Tips Can Help You Install a Laser Printer Smoothly?
A few smart tips can make your laser printer installation faster, easier, and free from common problems.
- Read the quick start guide that comes with the printer.
- The printer should be placed on a level, sturdy platform.
- The printer should be kept close to your computer or wireless network gateway.
- Use the original power cable and accessories.
- Make sure the toner is installed correctly.
- Do not overload the paper tray.
- Use clean, good-quality paper for better prints.
- The official website is the best place to get the most recent drivers.
- Update the firmware of the printer.
- Restart the printer if you face errors during setup.
- Test the printer after installation to confirm settings.
- Keep extra paper and toner handy for future use.
Final Thought
Although it may seem difficult at first, installing a laser printer is quick and stress-free if you follow the correct procedures. From my experience, taking a few minutes to carefully follow the setup guide always saves time later. I personally recommend checking connections twice before printing your first page to avoid common issues. Ready to get started? Follow the steps today and enjoy smooth, high-quality prints from your laser printer.
FAQS
Wi-Fi or a USB cable can be used to connect your laser printer to your computer. Simply select the printer from the network choices or plug in the wire. Your printer will then be ready after installing any necessary drivers.
Activate the printer and establish a Wi-Fi or USB connection with your computer. From the HP website, download and install the printer drivers. After completing the on-screen setup instructions, your HP LaserJet printer will be operational.
Connect your laser printer to the laptop by Wi-Fi or a USB cord. Make sure both devices are connected to the same network if you’re using Wi-Fi. After that, install the drivers to enable the laptop to recognise the printer.
Install the ink or toner after unpacking the printer and turning it on. Put paper in the tray and set up your computer’s drivers. Then, to make sure everything is functioning properly, print a test page.
The first step is to unbox the printer and connect it to a power source. After that, install the cartridges or toner, load paper, and follow the setup guide.
To print a document or file, open it. Choose your printer by clicking on File > Print. Click Print to begin after selecting the quantity of copies and pages.
From the control panel, choose Wi-Fi setup after turning on the printer. Link it to your wireless network. Then, in order for your computer to recognise the printer, you must install drivers.
Low toner, missing drivers, or paper problems can all cause this. Check the paper tray, restart the computer and printer, and reinstall any necessary drivers.
Navigate to Settings > Devices > Printers & Scanners on Windows. On Mac, open System Preferences > Printers & Scanners to see and manage printers.
Yes, most printers need driver software to work properly. The software helps your computer and printer communicate. You can download it from the printer’s official website.
For normal documents, standard A4 copy paper (70–80 GSM) is best. For important files, use thicker paper (90–120 GSM) for a professional look.
Go to the printer’s menu and find the reset or restore settings option. On many printers, this is under Setup > Tools > Reset. This will bring it back to factory defaults.


- Be Respectful
- Stay Relevant
- Stay Positive
- True Feedback
- Encourage Discussion
- Avoid Spamming
- No Fake News
- Don't Copy-Paste
- No Personal Attacks
- Be Respectful
- Stay Relevant
- Stay Positive
- True Feedback
- Encourage Discussion
- Avoid Spamming
- No Fake News
- Don't Copy-Paste
- No Personal Attacks
