Printer Streaking | Causes, Fixes, and Prevention Guide
Published: 11 Aug 2026
Have you ever printed an important document only to see annoying lines or marks across the page? It can be frustrating, especially when you need clean prints for work, school, or personal use. Printer streaks are a common problem, but they do not always mean your printer is damaged.
In many cases, the issue has a simple fix that you can do at home without spending money on repairs. This guide explains how to fix printer streaks using simple, step-by-step methods that anyone can follow. We will explain the most common causes, such as clogged printheads, low ink or toner, dirty rollers, and incorrect print settings. You will also discover simple maintenance tips to keep your printer working smoothly and avoid streaks in the future.
Whether you use an inkjet or laser printer, these practical methods can help you improve print quality and save both time and money. By the end of this article, you will know exactly what to check, what to clean, and how to get sharp, professional-looking prints again.
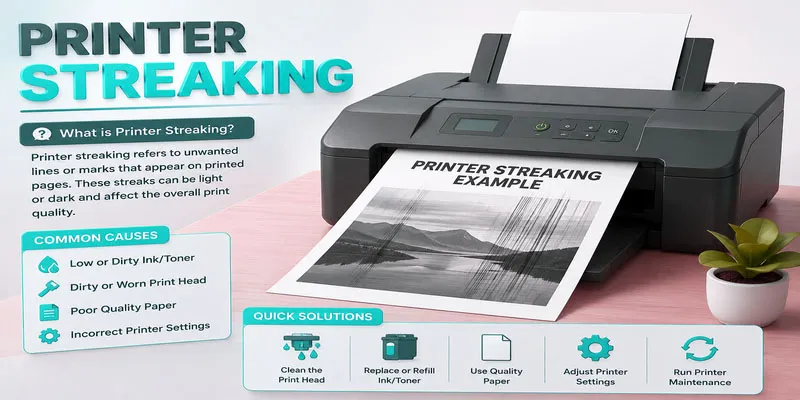
What are Printer Streaks?
Printer streaks are unwanted lines, marks, or smudges that appear on printed pages. They can be black, white, or colored, and may run across or down the paper. These streaks reduce print quality and make documents or photos look unprofessional. For example, if you print a school assignment or an office report, streaks can make the text hard to read. Printer streaks often happen because of clogged printheads, low ink or toner, dirty rollers, or worn printer parts. Finding the cause is the first step to restoring clear, sharp prints.
What Causes Printer Streaks?
Printer streaks can happen for many reasons. Some problems are easy to fix, while others may require replacing a printer part. Here are the most common causes:
- Clogged Printhead: Dried ink can block the tiny nozzles in the printhead. This stops ink from flowing evenly and creates lines or missing areas on the page. This problem is common in inkjet printers that are not used often.
- Low or Empty Ink Cartridges: When ink levels are low, the printer cannot produce consistent prints. This often leads to faded text, white streaks, or uneven colors.
- Low Toner or Worn Toner Cartridge: Laser printers use toner instead of ink. A low or damaged toner cartridge can leave black streaks, faded prints, or uneven coverage.
- Dirty Printer Rollers: Paper rollers collect dust, paper fibers, and ink over time. Dirty rollers may leave marks or smudges on printed pages and can also cause paper feeding problems.
- Worn Drum Unit: The drum unit transfers toner onto the paper in a laser printer. If it becomes scratched or worn out, you may notice repeated streaks or marks on every page.
- Poor-Quality or Damp Paper: Low-quality, dusty, or damp paper does not absorb ink or toner properly. This can result in streaks, smears, or blurry prints.
- Incorrect Print Settings: Choosing the wrong paper type or print quality settings can affect how the printer applies ink or toner. This may reduce overall print quality.
- Dust and Dirt Inside the Printer: Dust, dried ink, and toner particles can build up inside the printer. These particles may stick to internal parts and create unwanted lines or spots.
- Damaged or Faulty Cartridges: A leaking or damaged ink or toner cartridge can cause streaks even if it is not empty. Replacing the faulty cartridge usually solves the problem.
How to Fix Printer Streaks (Step-by-Step)
Before you replace any printer parts, follow these simple step-by-step methods to fix printer streaks and restore clear, sharp print quality on both inkjet and laser printers.
- Check Ink or Toner Levels
- Clean the Printhead
- Align the Printhead
- Clean the Printer Rollers
- Inspect the Drum Unit (Laser Printers)
- Replace a Damaged Ink or Toner Cartridge
- Use High-Quality Paper
- Check and Adjust Print Settings
- Print a Test Page
- Restart and Update Your Printer
- Clean the Inside of the Printer
- Contact Printer Support (If the Problem Continues)
Check Ink or Toner Levels
Low ink or toner is one of the most common causes of printer streaks. Make sure your printer has enough ink or toner, and install a new cartridge if the current one is running low or has run out. This simple step can often improve print quality and remove streaks.
Clean the Printhead
A clogged printhead can stop ink from flowing properly and cause streaks on your prints. Run the printer’s built-in printhead cleaning feature, then print a test page to check if the print quality has improved.
Align the Printhead
If the printhead is not aligned correctly, your printer may produce blurry text or streaks. Run the printhead alignment tool from your printer settings to improve print quality and create clear, accurate prints.
Clean the Printer Roller
Dirty printer rollers can leave streaks, smudges, or marks on the paper. Carefully wipe the printer rollers using a soft cloth that does not leave lint. Once finished, run a test print to confirm the issue is resolved.
Inspect the Drum Unit (Laser Printers)
A damaged or worn drum unit can cause black streaks or repeated marks on every page. Check the drum for scratches or damage, and replace it if needed to restore clear print quality.
Replace a Damaged Ink or Toner Cartridge
A damaged or leaking ink or toner cartridge can cause streaks and poor print quality. Replace the faulty cartridge with a new one to help your printer produce clean, clear, and sharp prints again.
Use High-Quality Paper
Using low-quality or damp paper can cause streaks, smudges, and uneven prints. Always use clean, high-quality paper that matches your printer’s recommended paper type for the best print results.
Check and Adjust Print Settings
Wrong print settings can affect print quality and cause streaks. Make sure you select the correct paper type and print quality in your printer settings before printing.
Print a Test Page
After making the changes, print a test page to check if the streaks are gone. If the print looks clear, the problem is fixed. If not, repeat the cleaning steps or inspect other printer parts.
Restart and Update Your Printer
Restart your printer to clear temporary errors that may affect print quality. Also, install the latest printer driver or firmware update to improve performance and fix common printing problems.
Clean the Inside of the Printer
Dust, dried ink, and toner can build up inside your printer over time. Gently clean the inside with a soft, lint-free cloth to help prevent streaks and improve print quality.
Contact Printer Support (If the Problem Continues)
If your printer still leaves streaks after trying all the fixes, contact the printer manufacturer’s support team. They can help diagnose the problem or recommend a repair or replacement if needed.
How to Prevent Printer Streaks?
Preventing printer streaks is easier than fixing them. Regular care can improve print quality and help your printer last longer. Follow these simple tips:
- Print regularly: If you use an inkjet printer, print a page at least once a week to keep the ink flowing smoothly. This helps prevent the printhead from clogging with dried ink.
- Keep your printer clean: Dust and paper particles can build up inside the printer. Wipe the outside and clean the rollers and other accessible parts as recommended by the manufacturer.
- Check ink or toner levels: Install new ink or toner cartridges before the old ones become empty and begin affecting your printed pages.
- Use high-quality paper: Good paper reduces the risk of streaks, smudges, and paper jams. Always store paper in a dry place to protect it from moisture.
- Choose the correct print settings: For the best print quality, select the correct paper type and printing mode before you start printing.
- Avoid touching the drum unit or printhead: Oils from your fingers can damage these sensitive parts and reduce print quality.
- Update your printer driver: Installing the latest driver or firmware can fix printing issues and improve printer performance.
- Turn off your printer properly: Use the printer’s power button instead of unplugging it. This helps protect the printhead and other internal parts.
- Follow the maintenance schedule: Run printhead cleaning or maintenance tools when your printer recommends them.
What are the Most Common Printer Streak Problems and Their Solutions?
Understanding the most common printer streak problems and their solutions can help you quickly identify the cause of poor print quality and choose the right fix to restore clear, streak-free prints.
| Problem | Cause | Solution |
|---|---|---|
| Black streaks on paper | Dirty drum unit or toner cartridge. | Clean or replace the drum or toner cartridge. |
| White streaks on prints | Clogged printhead or low ink. | Clean the printhead and replace low ink cartridges. |
| Colored streaks | Low color ink or clogged nozzles. | Run a printhead cleaning cycle and refill or replace the color cartridge. |
| Horizontal lines | Misaligned printhead. | Run the printhead alignment tool. |
| Vertical lines | Dirty rollers or damaged drum. | Clean the rollers or replace the drum unit. |
| Faded prints | Low ink or low toner. | Replace the ink or toner cartridge. |
| Smudges on paper | Dirty rollers or excess toner. | Clean the rollers and remove loose toner inside the printer. |
| Repeated marks on every page | Worn drum unit. | Replace the drum unit. |
| Uneven print quality | Incorrect print settings. | Select the correct paper type and print quality settings. |
| Blurry text or images | Printhead alignment issue. | Align the printhead and print a test page. |
| Ink streaks after cartridge replacement | Cartridge not installed correctly. | Reinstall the cartridge and check for proper placement. |
| Toner streaks on laser prints | A faulty or leaking toner cartridge. | Install a new toner cartridge to restore normal print quality. |
| Streaks on photo prints | Poor-quality or damp paper. | Use high-quality photo paper and keep paper dry. |
| Streaks even after cleaning | Internal printer hardware problem. | Contact printer support or have the printer serviced. |
When Should You Replace Printer Parts?
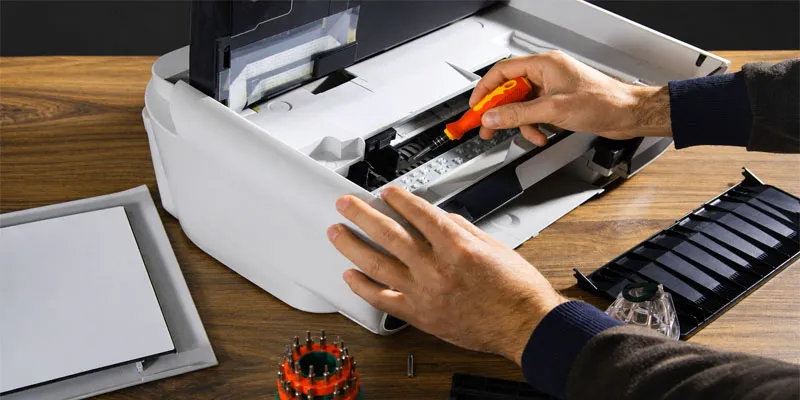
You should replace printer parts when cleaning and basic troubleshooting no longer fix the problem. For example, if your printer still leaves streaks after cleaning the printhead, it may be time to replace the printhead or ink cartridge. If you use a laser printer and notice repeated black lines on every page, the drum unit or toner cartridge may need replacing. Worn paper rollers can also cause paper jams and poor print quality.
Most printer parts have a limited lifespan, so replacing them at the right time helps keep your printer working properly. If you are unsure which part is causing the problem, print a test page or check your printer’s maintenance report. Replacing worn parts early can improve print quality, reduce repair costs, and extend the life of your printer.
Final Thoughts
Knowing how to fix printer streaks can save you time, money, and frustration. Simple steps like cleaning the printhead, checking ink or toner levels, and maintaining your printer often solve most print quality issues. If you found this guide helpful, explore our other printer troubleshooting tips to keep your printer running smoothly. With regular care, you can enjoy clear, streak-free prints every time.
FAQs
To prevent printer streaks, keep your ink or toner cartridges in good condition, clean the printhead regularly, and wipe the rollers to remove dust and debris. Using the correct paper type and adjusting your printer settings can also help produce cleaner, sharper prints.
If your printer is printing in streaks even with full ink, the printhead may be clogged or misaligned. Cleaning and aligning the printhead usually restores smooth ink flow and produces clear, streak-free prints.
You can fix printer streaks by running your printer’s built-in cleaning cycle and gently cleaning the rollers. After cleaning, print a test page to confirm the streaks are gone and the print quality has improved.
To unclog a printhead, use the printer’s automatic printhead cleaning feature from the maintenance menu. If the blockage remains, carefully clean the printhead manually by following your printer manufacturer’s instructions.
To get rid of printer lines, replace low ink or toner cartridges, clean the printhead, and check the drum unit if you have a laser printer. Regular printer maintenance helps keep every page clean and sharp.





- Be Respectful
- Stay Relevant
- Stay Positive
- True Feedback
- Encourage Discussion
- Avoid Spamming
- No Fake News
- Don't Copy-Paste
- No Personal Attacks
- Be Respectful
- Stay Relevant
- Stay Positive
- True Feedback
- Encourage Discussion
- Avoid Spamming
- No Fake News
- Don't Copy-Paste
- No Personal Attacks
